
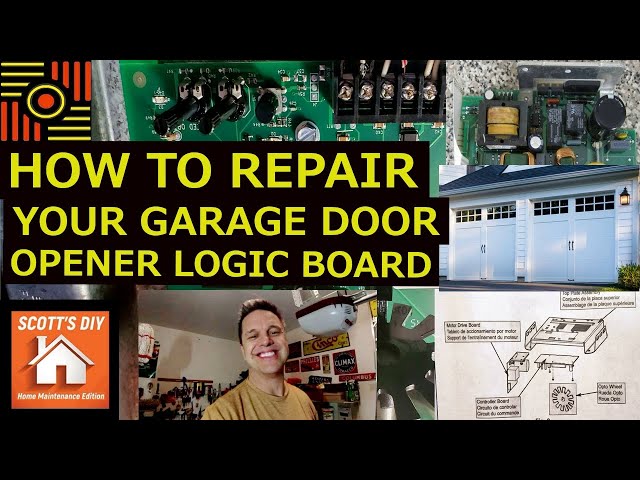
Most Liftmaster logic board issues are fixed by checking power, fuses, wiring, and sensors.
I’ve spent years diagnosing garage door electronics, and this guide dives deep into Liftmaster Logic Board Troubleshooting. You’ll get clear steps, realistic tests, and hands-on tips to find faults, fix common problems, and decide when to replace the board. Read on to gain practical skills and avoid costly mistakes when dealing with Liftmaster Logic Board Troubleshooting.
What is a Liftmaster Logic Board and why it matters
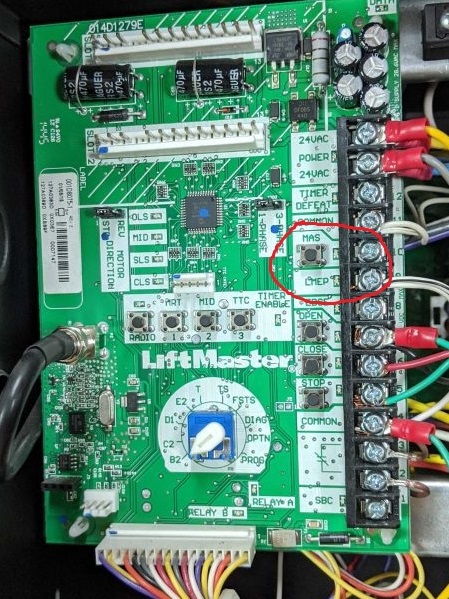
The Liftmaster logic board is the electronic brain inside your garage door opener. It manages power, sensors, remotes, safety reversing, and motor commands. Faults on the board can stop the opener, cause random reversals, or make controls unresponsive.
Understanding Liftmaster Logic Board Troubleshooting starts with knowing what the board controls. It interprets wall button signals, remote codes, and safety beam inputs. When the logic board fails, symptoms can mimic many other issues, so careful diagnosis is key.

Common symptoms of a failing Liftmaster logic board
Spotting the right symptom speeds Liftmaster Logic Board Troubleshooting. Watch for:
- Opener doesn't respond to remotes or wall control. Often the board is not processing inputs.
- Opener motor hums but does not move. Could be relay or power delivery on the board.
- Intermittent operation or random reversals. Logic errors or shorted components may be present.
- LED error codes or unusual LED blink patterns on the board. These give diagnostic clues.
- Safety sensors show "blocked" when they are clear. The board's sensor circuit could be faulty.

Source: youtube.com
Tools and safety steps before troubleshooting
Always prioritize safety during Liftmaster Logic Board Troubleshooting. Gather these tools and follow basic safety steps.
- Tools needed: multimeter, insulated screwdriver set, needle-nose pliers, voltage tester, replacement fuses, and a camera to document wiring.
- Safety steps: unplug or disconnect power before opening the opener. Lock the garage door in place if possible. Wear eye protection.
- Work environment: clear the area, keep remote batteries removed, and avoid loose clothing near moving parts.
- Firmware and documentation: have the model number and manual handy for LED code references.

Source: reddit.com
Step-by-step Liftmaster logic board troubleshooting process
A systematic process reduces guesswork. Follow these tests in order for efficient Liftmaster Logic Board Troubleshooting.
- Verify power supply
- Confirm the opener is plugged in and outlet has power using a voltage tester.
- Check for tripped breakers or blown outlet fuses.
- Inspect visible fuses and wiring
- Open the opener cover with power disconnected.
- Look for blown inline fuses, burned components, or loose connectors.
- Test the wall control and remotes
- Disconnect the wall control wires from the board and test continuity.
- Try a hardwired wall switch to isolate wireless faults.
- Check safety sensors
- Use a meter to ensure both sensor housings get power and the LED states are normal.
- Clean lens areas and confirm proper alignment.
- Measure logic board voltages
- With power on and using caution, measure board supply voltages per manual.
- Compare measured volts to expected values; low or absent volts point to board power faults.
- Observe LED patterns and error codes
- Note blink counts and sequences. These narrow the problem to motor, travel, or sensor subsystems.
- Swap known-good components
- If you have a compatible board or component, swap to confirm the diagnosis.
- Document and decide
- If tests point to board failure, compare repair cost vs replacement.

Source: reddit.com
Common LED codes and what they indicate
Liftmaster Logic Board Troubleshooting often depends on reading LED behavior. LED patterns are concise clues.
- Steady power LED but no function: power rail or relay issue.
- Slow repeating blinks: motor overload or mechanical bind.
- Rapid blink sequences: sensor misalignment or short.
- No LED at all: no incoming power or blown internal fuse.
Use the manual for exact blink counts tied to your model. If manual codes are unclear, record the blink pattern and proceed with voltage and continuity checks for confirmation.

Source: reddit.com
Troubleshooting specific problems and fixes
Targeted fixes make Liftmaster Logic Board Troubleshooting efficient. Here are common scenarios and practical fixes.
- Remotes stop working
- Replace remote batteries, reprogram remote per manual, check antenna wire, and confirm board radio module power.
- Opener reverses randomly
- Clean and align safety sensors, inspect photo-eye wiring at the board, and check for board shorts.
- Motor hums but door won’t move
- Test motor capacitor and drive relay on the board. Check trolley and carriage for mechanical binds.
- Wall control shows no response
- Test wall button wiring for short to ground. Swap a known-good switch to isolate board input.
- LED errors on the logic board
- Record pattern, test sensors, check motor connections, and verify board voltages.
Source: youtube.com
- Record pattern, test sensors, check motor connections, and verify board voltages.
Repair vs replace: deciding for the logic board
When to repair or replace is a key part of Liftmaster Logic Board Troubleshooting. Consider these factors.
- Age and warranty: If under warranty, seek replacement. Older openers may justify replacement.
- Cost comparison: Replacement board cost plus labor vs full opener replacement.
- Availability: Some older boards are discontinued. If parts are rare, replacing the opener may be smarter.
- Complexity of fault: Simple fuse or relay replacement is economical. Multiple blown components hint at broader failure.
- Safety and certification: If you lack experience, professional replacement ensures safety and correct programming.

Source: ebay.com
Preventive maintenance to reduce logic board failures
Routine care cuts down emergencies and helps Liftmaster Logic Board Troubleshooting become rare.
- Keep the opener and logic board dry and clean. Moisture causes corrosion.
- Inspect wiring and terminals annually for looseness or corrosion.
- Replace batteries on remotes yearly and test safety sensors monthly.
- Avoid DIY modifications that bypass safety circuits. These can damage the board and void warranty.
- Use surge protection at the outlet to reduce damage from power spikes.
Source: youtube.com
Personal experiences, lessons learned, and practical tips
I’ve repaired dozens of openers and learned simple truths about Liftmaster Logic Board Troubleshooting.
- Don’t assume the board is bad. Half the issues I fixed were loose wires or clogged sensors.
- Always photograph wiring before disconnecting. It saves time and prevents errors.
- I once replaced a board only to find a smoke-damaged capacitor caused cascading failures. Test power rails before spending money.
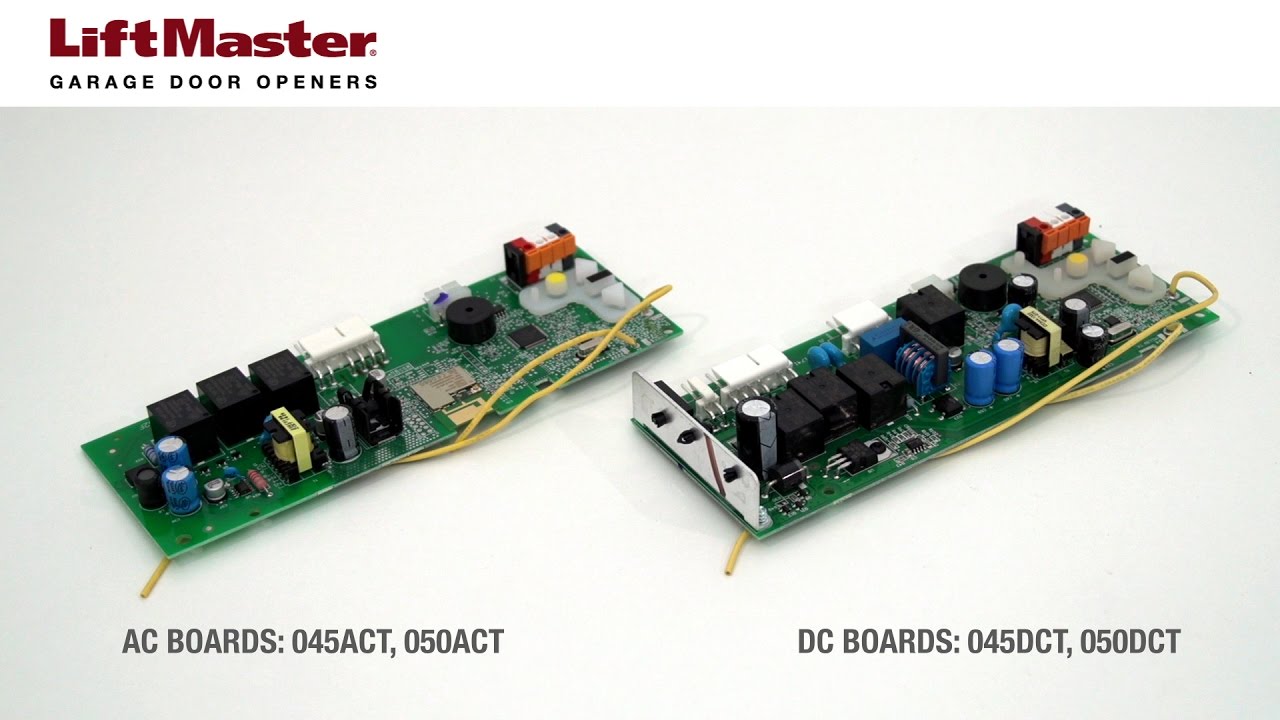
- Use proper replacement boards matched to model numbers. Generic boards can create headaches.
- When in doubt, call a pro. A small service call can prevent a risky DIY mistake.
People also ask (PAA) — quick answers
What causes logic board failure on a Liftmaster opener?
- Common causes include power surges, moisture, physical damage, and failed components like capacitors or relays.
Can I test a Liftmaster logic board at home?
- Yes, you can perform basic checks like power, fuses, sensor LEDs, and continuity. Use caution and follow safety steps.
How long does a Liftmaster logic board last?
- With good care, logic boards last many years; exposure to moisture and power spikes shortens their life.
Is it safe to bypass safety sensors when troubleshooting?
- No. Bypassing sensors is unsafe and can lead to injury. Test with the safety system intact.
Will replacing the logic board fix all opener issues?
- Not always. Mechanical problems, motor failures, and wiring issues can mimic logic board faults.
Frequently Asked Questions of Liftmaster Logic Board Troubleshooting
What are the first signs my Liftmaster logic board is failing?
A common sign is intermittent operation or inconsistent responses from remotes and wall controls. LED error patterns and unexplained reversing also suggest board issues.
Can a power surge damage the logic board?
Yes. Power surges often burn components or blow internal fuses, causing total or partial failure of the logic board.
How do I check the safety sensors during troubleshooting?
Visually inspect alignment and LEDs, test for 12-24V at the sensor leads, and check wiring continuity back to the logic board.
Is replacing a Liftmaster logic board difficult?
For someone comfortable with basic wiring and safety, replacement is straightforward, but it requires correct board matching and programming.
When should I call a professional for Liftmaster logic board issues?
Call a professional if you find burnt components, complex voltage faults, or if you are uncomfortable working near live circuits and moving door parts.
Can a loose wire mimic a bad logic board?
Absolutely. Loose, corroded, or broken wires often cause symptoms identical to logic board failure and should be checked first.
Are replacement logic boards expensive?
Costs vary by model and supplier. Some boards are affordable, while obsolete models can be pricier due to limited availability.
How do I program a new logic board?
Programming steps depend on the model; generally you follow the manual to set travel limits, remote codes, and safety settings. If unsure, get professional help.
Conclusion
You now have a clear, practical path for Liftmaster Logic Board Troubleshooting. Start with power and simple checks, use measured diagnostic steps, and avoid assumptions that the board is always the culprit. Apply the safety tips, document your work, and consider professional help for complex faults. Take action: inspect your opener, run the simple tests here, and comment with your model and symptoms if you want tailored advice.

