
Liftmaster Garage Door Opener Troubleshooting fixes for common power, sensor, remote, and safety issues.
I have repaired and diagnosed dozens of LiftMaster openers over the years. This guide on Liftmaster Garage Door Opener Troubleshooting breaks problems down into clear steps. You will learn how to find root causes, run safe tests, interpret LED codes, and choose when to call a pro. I explain tools, simple fixes, and safety tips in plain language so you can fix many issues yourself or speak confidently with a technician.
What is Liftmaster Garage Door Opener Troubleshooting?
Liftmaster Garage Door Opener Troubleshooting is the process of finding and fixing problems with LiftMaster openers. These problems include power failures, stuck doors, remote or keypad issues, sensor faults, odd noises, and safety reversals. Troubleshooting follows a logical path: observe, isolate, test, fix, and verify. Knowing this path keeps work safe and efficient.

Common problems and what they mean
Most LiftMaster issues fall into a few groups. Identifying the group makes fixes faster.
- Power and electrical issues: No power, tripped breakers, or outlet problems.
- Remote and keypad issues: Dead batteries, lost programming, or interference.
- Safety sensor problems: Misalignment, dirt, or blocked sensors causing reversal.
- Mechanical and hardware failures: Worn rollers, broken springs, or stripped gears.
- Travel and force problems: Limits set wrong or force adjustment needed.
- Noise and vibration: Worn belt, failing motor, or loose hardware.
Each of these needs a different approach in Liftmaster Garage Door Opener Troubleshooting. Start with the simplest checks first.

Tools and safety checklist before troubleshooting
Safety first. Garage doors can be heavy and springs store dangerous energy. Do these steps before you start Liftmaster Garage Door Opener Troubleshooting.
- Unplug the opener or shut power at the breaker when working near motor electronics.
- Wear safety glasses and gloves.
- Have a ladder, voltmeter (or non-contact tester), basic sockets, screwdrivers, and a ladder ready.
- Keep kids and pets away from the work area.
- If you smell burning or see sparks, stop and call a professional.
These precautions reduce risk and help you troubleshoot calmly.
Step-by-step Liftmaster Garage Door Opener Troubleshooting
Follow these ordered checks for most problems. Each step is short and clear.
- Check power and LEDs
- Verify outlet power with a lamp or tester.
- Ensure the opener is plugged in securely.
- Check the opener’s status LED for error patterns.
- Test wall control
- Press the wall button to open or close.
- If the wall control works but remotes do not, the issue is likely remote programming or receiver.
- Inspect safety sensors
- Make sure both sensors face each other and LEDs are steady.
- Clean sensor lenses gently.
- Remove any obstruction from the sensor path.
- Try remotes and keypad
- Replace remote and keypad batteries.
- Reprogram remote if needed.
- Observe door motion
- Watch travel for hesitation, binding, or uneven movement.
- Check rollers, tracks, and hinges for damage.
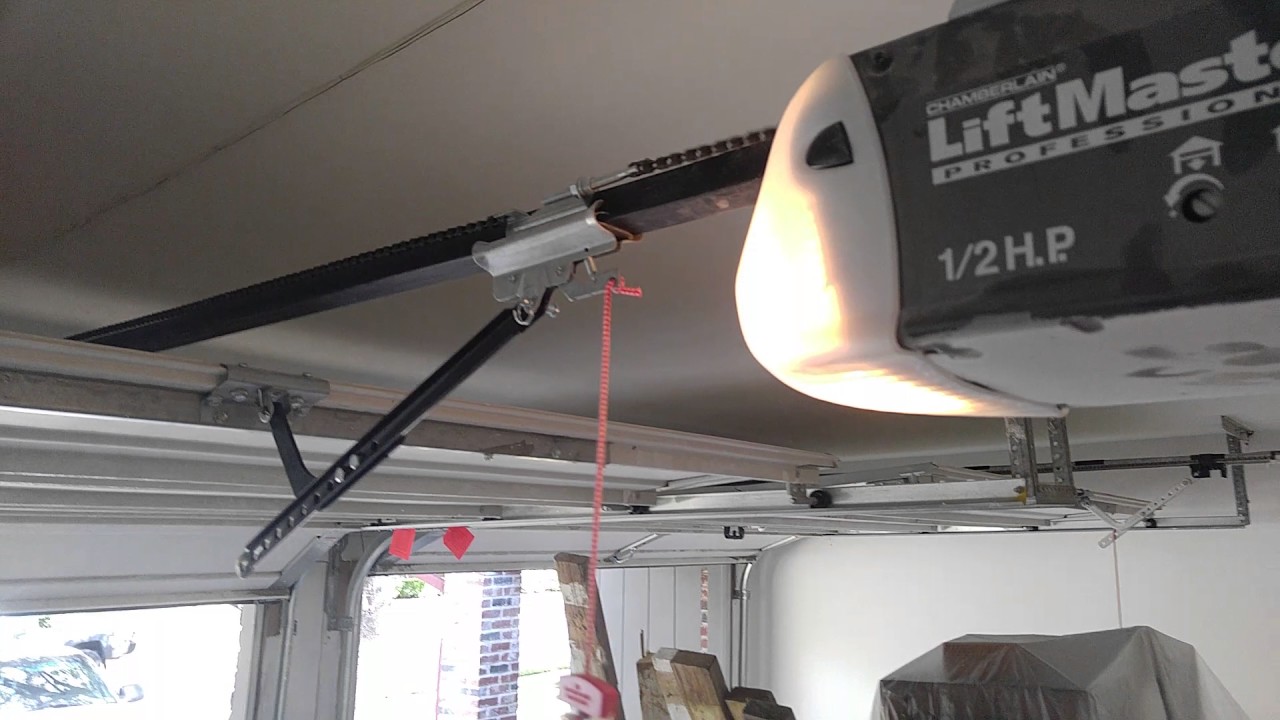
- Test manual release
- Pull the emergency release when the door is closed to test manual operation.
- If the door is hard to lift, call a pro for spring work.
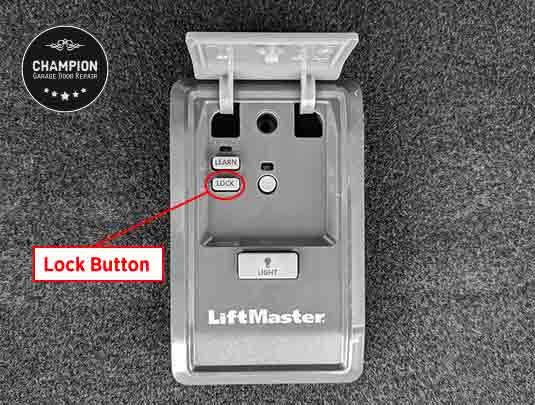
- Reset and reprogram
– Use the learn/Smart button to clear and reprogram remotes and keypads.
- Consult the model manual for exact steps.
These steps cover the core of Liftmaster Garage Door Opener Troubleshooting. If one step fixes the problem, verify the door cycles several times.

Power, motor, and electrical troubleshooting (h3)
Power issues are common. Here’s how to isolate them quickly.
- Confirm the outlet works by plugging a lamp into the opener outlet.
- Check the circuit breaker and any GFCI outlets.
- Look for a blown fuse or a tripped breaker in older garage panels.
- If the opener hums but won’t run, the motor capacitor or internal board might be failing.
When you find wiring damage or a fried control board, replacement or expert repair is often needed.

Sensor, safety, and reversal problems (h3)
Sensors stop doors from closing on objects. They are common sources of trouble.
- Inspect sensors for dirt, spider webs, or paint.
- Align sensors so their LEDs show green or solid light.
- Replace cracked or water-damaged sensor housings.
- If sensors pass a basic test but still cause reversals, check wiring to the opener for loose connectors.
Correct sensor alignment and clean lenses fix many Liftmaster Garage Door Opener Troubleshooting scenarios.

Remote control, keypad, and MyQ issues (h3)
Remote and smart features can be simple to repair.
- Replace remote and keypad batteries first.
- Use the opener’s learn button to reprogram remotes and keypads.
- For MyQ app problems, check Wi-Fi signal, app updates, and account settings.
- If multiple remotes fail, reset the opener’s receiver and reprogram devices.
Keep remotes away from stores or devices that cause radio interference.
Noise, vibration, and mechanical problems (h3)
Noise often points to mechanical wear. Address it like this.
- Tighten loose bolts and brackets.
- Replace worn rollers and hinges.
- Lubricate metal rollers, hinges, and the torsion bar with a light silicone or lithium grease. Do not lubricate nylon rollers.
- A grinding motor likely needs service or replacement.
Regular maintenance reduces these problems and simplifies Liftmaster Garage Door Opener Troubleshooting.
Travel limits, force settings, and the door reverses (h3)
If the door reverses or won’t close fully, travel and force may need tuning.
- Locate limit and force adjustment screws on the opener head.
- Adjust travel limits in small increments and test after each change.
- Increase door-close force slightly if the door stalls, but be careful to keep safety reversal functional.
- If adjustments do not fix the issue, inspect tracks, rollers, and springs for binding.
Improper adjustments can create safety hazards. If unsure, ask a professional.
Diagnostic LED codes and what they mean (h3)
LiftMaster openers often use LEDs or flashing patterns to indicate issues.
- Solid lights can mean power is good.
- Rapid flashing may signal a sensor fault or wiring short.
- Consult the model manual for exact patterns specific to your unit.
Use LED patterns to speed up Liftmaster Garage Door Opener Troubleshooting and avoid guesswork.
Maintenance schedule and tips to avoid problems
A little preventive work avoids many trips. Keep a simple schedule.
- Monthly: Visual check for loose hardware and debris.
- Every 6 months: Lubricate moving metal parts and check sensor alignment.
- Annually: Inspect springs, cables, and rollers. Replace worn parts.
- Replace batteries in remotes and keypads yearly.
Good maintenance saves money and prevents sudden failures.
When to call a professional
Some tasks are best left to trained pros. Call one if:
- Springs need replacement or adjustment.
- You smell burning or see smoke from the opener.
- The motor clicks but doesn’t run, and internal repair is required.
- Door is heavy or hard to lift manually.
- Safety sensors or electronics indicate serious failure despite basic fixes.
Professionals have tools and training to do high-risk repairs safely.
Personal insights and lessons learned
I have worked on many LiftMaster openers. A few practical lessons help most people.
- Always start with power and the wall button. These solve many problems fast.
- Keep spare batteries on hand for remotes and keypads.
- Don’t overtighten torsion or extension spring fasteners. I once overtightened and caused extra wear.
- Clean sensors gently. A soft cloth fixed a reversing problem that looked complicated.
Small habits cut future headaches and make Liftmaster Garage Door Opener Troubleshooting faster.
Common quick questions (PAA-style)
How do I reset my LiftMaster garage door opener?
Press and hold the Learn button for about 6 seconds until the LED goes out to erase all remote codes; then reprogram remotes as needed.
Why does my LiftMaster opener hum but not run?
A humming motor often means a failed capacitor or internal motor problem. Test power first, then call a technician if humming continues.
How close should safety sensors be aligned?
Sensor lenses should face each other with LEDs steady. Small misalignment or dirt will cause the door to reverse.
Frequently Asked Questions of Liftmaster Garage Door Opener Troubleshooting
What should I check first when my LiftMaster won't open?
First check power: ensure the outlet works, the unit is plugged in, and the circuit breaker is not tripped. Test the wall control to narrow the issue.
Why does my door close then immediately reopen?
This usually means the safety sensors are blocked or misaligned, or the force setting is too low. Clean and realign sensors and test again.
Can I replace the springs myself?
No. Garage door springs store high energy and can be dangerous. A trained technician should handle spring replacement.
How do I program a new remote?
Use the Learn or Smart button on the opener head, following the model-specific steps. Press Learn, then press the remote button within 30 seconds.
What causes the opener to reverse mid-close?
Common causes are sensor obstruction, misalignment, binding in the track, or incorrect force/limit settings. Inspect sensors and door movement.
How often should I service my LiftMaster opener?
Service major components annually and do quick checks monthly. Replace worn rollers and frayed cables when noticed.
Why is my MyQ app not connecting?
Check Wi-Fi signal, network credentials, and app permissions. Restart your router and opener’s Wi-Fi bridge if needed.
Conclusion
You now have a clear, practical path for Liftmaster Garage Door Opener Troubleshooting. Start with power checks and wall control tests. Clean and align sensors, replace small parts like batteries, and adjust limits carefully. Use simple maintenance to prevent most issues, and call a pro for springs, motor repairs, or anything that feels unsafe. Put these tips into practice, and you’ll save time and money while keeping your garage door safe and reliable. Try the steps above, subscribe for more how-to guides, or leave a comment with your specific problem.

