
Webasto troubleshooting codes identify heater faults and guide quick, safe repairs for vehicle and marine heaters.
I have worked on Webasto heaters for years, diagnosing faults on cars, trucks, and boats. This guide explains Webasto Troubleshooting Codes in clear terms. You will learn what the codes mean, how to read them, and how to fix common problems. I combine hands-on tips, test steps, and real-world examples so you can act with confidence.
How Webasto Troubleshooting Codes Work
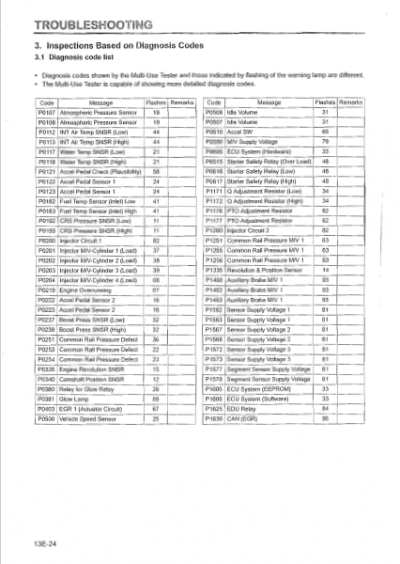
Webasto Troubleshooting Codes are short messages or numbers that tell you why a heater stopped working. These codes come from the heater control unit. They monitor sensors, the combustion process, electrical supply, and communication lines.
Codes usually fall into clear groups. Examples include fuel system errors, ignition or glow failures, fan or airflow faults, sensor faults, overtemperature, and communication faults. Each group points you to a subsystem to inspect.
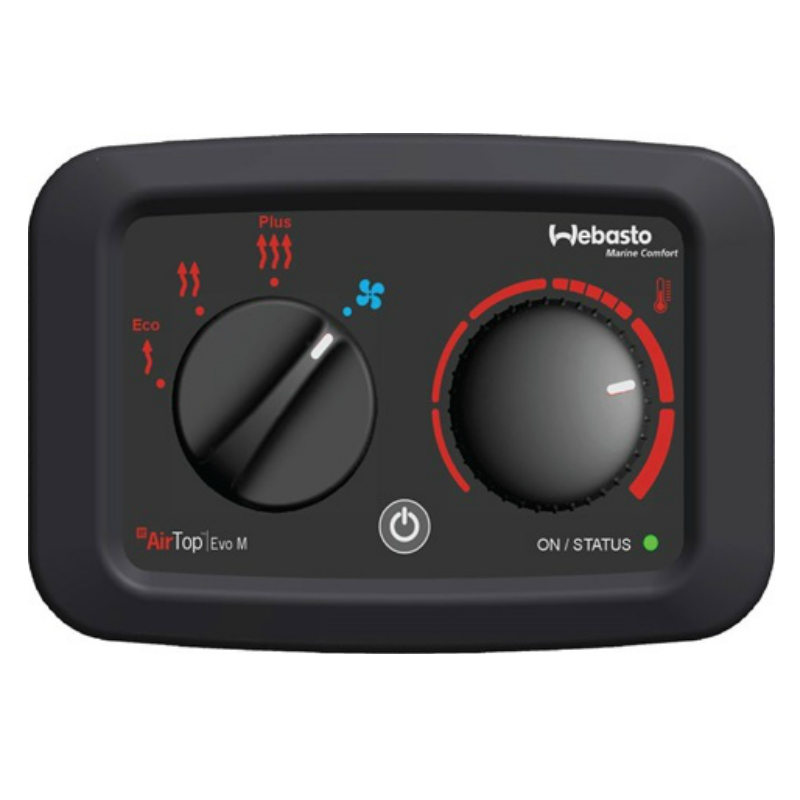
Reading codes can be done from the heater display, a diagnostic tool, or the vehicle’s control network. Always record the exact code and any conditions when the heater failed. This helps you narrow down causes fast.
Common Webasto Troubleshooting Codes and What They Mean
Webasto Troubleshooting Codes vary by model, but common failure types repeat. Below I list typical fault types and what they usually indicate.
- Fuel delivery or supply errors
- Means the heater is not getting fuel or the fuel pump won’t prime. Check filter, lines, and pump.
- Ignition or glow plug failures
- Means the heater cannot ignite. Glow plug, glow relay, or glow control may be faulty.
- No flame or flame detection error
- The heater tries to ignite but flame sensor does not confirm combustion. Inspect burner and electrodes.
- Fan or airflow faults
- Fan motor failure, blocked intake, or worn bearings reduce air flow and trigger a fault.
- Overtemperature or coolant sensor fault
- Heater sensed too-high temperatures or an open/short sensor. Check coolant level and sensor wiring.
- Exhaust or combustion chamber faults
- Blocked exhaust or soot buildup can trigger safety shutdowns.
- Electrical supply or low battery
- Low voltage or intermittent supply causes the heater to stop and log a code.
- Communication errors (CAN, LIN, or proprietary)
- Means the control unit cannot talk to a panel or vehicle. Check connectors and wiring.
These categories cover most Webasto Troubleshooting Codes. Treat them as a map. Start with simple checks and then move to deeper diagnostics.
Step-by-Step Troubleshooting Process
Follow a simple process to diagnose Webasto Troubleshooting Codes. I use this routine in the field. It saves time and reduces mistakes.
- Note the exact code and conditions
- Write down the code, time, ambient temp, and heater behavior.
- Ensure safety first
- Work in a ventilated area. Disconnect power if you inspect wiring or fuel lines.
- Check basic power and fuel
- Test battery voltage and ground. Check fuel level and lines for leaks or blockages.
- Inspect air and exhaust paths
- Clear debris and soot. Ensure vents are not blocked.
- Test glow plug and ignition system
- Measure resistance and continuity. Check relays and fuses.
- Verify sensors and wiring
- Inspect connectors for corrosion. Use a multimeter for sensor signals.
- Use a diagnostic tool
- Read full fault history. Clear non-persistent faults and run the self-test.
- Reproduce the fault
- Run the heater under the same conditions to confirm the fix.
This routine helped me fix most Webasto Troubleshooting Codes on my first visit. It keeps work logical and reduces parts swaps.
Tools and Diagnostic Options
Having the right tools makes Webasto Troubleshooting Codes easy to tackle. Here are essentials I recommend.
- Multimeter
- For voltage, resistance, and continuity checks.
- Handheld diagnostic adapter or manufacturer tool
- For reading stored fault codes and live data.
- Fuel primer and vacuum tester
- To check fuel flow and pump function.
- Small inspection camera
- To view the combustion chamber and exhaust path.
- Spare sensors and glow plugs
- Keep common parts on hand for quick swaps.
Professional shops may use the factory Webasto diagnostic software. That gives live sensor values and clear fault descriptions. If you do not have it, a good adapter plus logical checks can still resolve most Webasto Troubleshooting Codes.
Maintenance Steps to Prevent Codes
Routine care reduces the chance you will see Webasto Troubleshooting Codes. I follow a regular list for every heater I service.
- Replace fuel and air filters regularly.
- Keep the combustion chamber clean.
- Inspect fuel lines for cracks and secure fittings.
- Test battery health and charging system.
- Check vent and exhaust for blockages.
- Update heater software and controller firmware when available.
Simple maintenance cuts downtime. It also helps prevent hard-to-diagnose intermittent faults that trigger Webasto Troubleshooting Codes.
Real-World Examples and Lessons Learned
I once diagnosed a recurring "no flame" fault on a coach heater. The code suggested ignition failure. I replaced the glow plug. The fault returned. A deeper check showed a sagging ground cable. After tightening the ground and cleaning the connector, the heater ran fine.
Key lessons from years of work with Webasto Troubleshooting Codes:
- Always verify power and ground first.
- Replace parts only after testing.
- Keep clear notes. Codes plus conditions point to root causes.
- Soot buildup can mimic electrical faults. Clean and retest.
These simple habits cut repeat visits and save parts costs.

PAA-Style Quick Questions
How do I read Webasto fault codes from the heater?
Use the heater control panel or diagnostics tool. Note the code and use the manual or diagnostic app to interpret it.
Can I clear Webasto codes myself?
Yes. Many codes clear with the diagnostic tool or after fixing the issue. Permanent fixes prevent return of the code.
Will low battery trigger Webasto errors?
Yes. Low voltage can stop fans or ignition and log multiple Webasto Troubleshooting Codes. Test battery voltage before deeper diagnosis.
Frequently Asked Questions of Webasto Troubleshooting Codes
What does a flame failure code mean?
A flame failure code means the heater tried to ignite but the flame sensor did not detect combustion. Check glow plug, fuel feed, and the burner for soot or blockage.
How do I know if it’s a fuel problem?
If the heater primes but won’t keep running, or the fuel pump is noisy, the issue is likely fuel-related. Inspect filters, hoses, and pump operation.
Can sensors cause false codes?
Yes. Faulty or disconnected sensors can trigger Webasto Troubleshooting Codes. Test sensor resistance and wiring first.
Is it safe to run the heater with a stored code?
Not always. Some codes indicate unsafe conditions like overtemperature or exhaust blockage. Assess the code and fix safety faults before running.
When should I use a professional diagnostic tool?
Use a professional tool if codes repeat, if multiple codes appear, or if you need live sensor data. Complex electrical or combustion issues often need factory tools.
How often should maintenance be done to prevent codes?
Inspect annually, or more often if used heavily. Replace filters and clean the combustion chamber at recommended intervals to reduce faults.
Are all Webasto codes model-specific?
Yes. Exact code numbers and text vary by model. However, the fault categories are similar across most Webasto heaters.
Conclusion
Webasto Troubleshooting Codes are a clear map to heater issues. Read the code, follow a safe, logical checklist, and use the right tools. Regular maintenance prevents many faults and saves time. Start by checking power, fuel, and airflow, then move to sensors and ignition. If you are stuck, use a diagnostic tool or seek professional help.
Put these steps into practice. Track codes and repairs. You will reduce repeat failures and get your heater running reliably. If you found this helpful, leave a comment, subscribe for more guides, or share your Webasto Troubleshooting Codes story.

