
Hunter PGV valve troubleshooting often fixes clogs, wiring issues, and diaphragm failures quickly.
I have spent years fixing irrigation systems and training teams on valve repair. This guide on Hunter Pgv valve troubleshooting walks you through how the valve works, common symptoms, clear diagnostic steps, and practical fixes you can try today. Read on to learn simple tests, safety tips, and when to replace parts or call a pro.
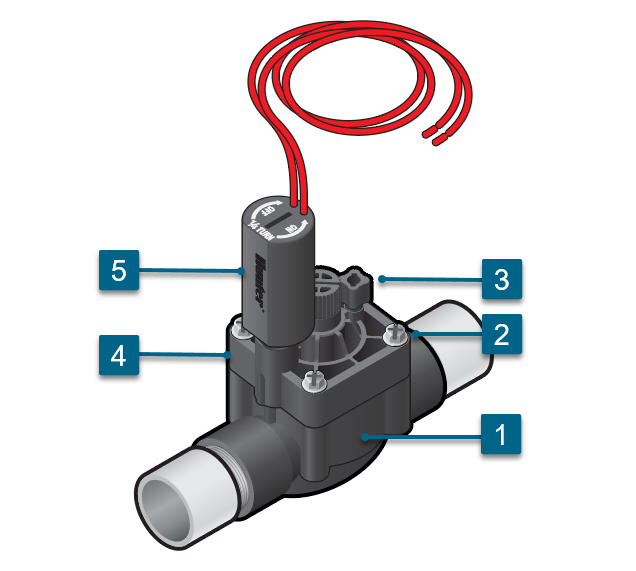
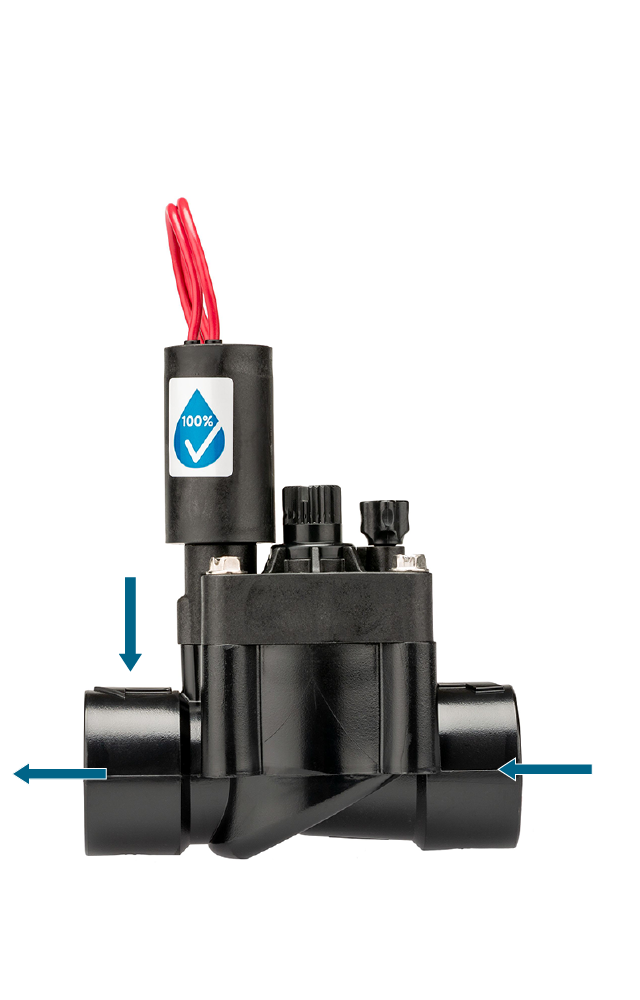
Overview: What is the Hunter PGV valve and why troubleshoot it
The Hunter PGV valve is a heavy-duty irrigation valve. It controls water flow to sprinkler zones. Many homeowners and pros use it because it is reliable and affordable.
Troubleshooting a Hunter PGV valve means finding why it won't open, won't close, leaks, or cycles incorrectly. Quick troubleshooting saves water and time. Knowing the common failure points makes repair fast and cheap.
How the Hunter PGV valve works
The PGV valve is a diaphragm valve. Water pressure pushes the diaphragm to open or close flow. The solenoid sends an electrical signal that lets water move across the diaphragm.
The valve body, diaphragm, bonnet, and solenoid are key parts. Dirt, worn diaphragms, or bad wiring stop the valve from working. Understanding this helps with Hunter PGV valve troubleshooting.

Common problems with Hunter PGV valve troubleshooting
Here are the issues you will see most often when doing Hunter PGV valve troubleshooting:
- Valve will not open when controller calls.
- Valve stays open and won’t shut off.
- Valve cycles rapidly or pulses.
- Slow or weak water flow to the zone.
- Visible leakage at the valve or bonnet.
Each of these problems has typical causes. Dirt in the valve, worn diaphragms, bad solenoid, or an electrical fault are common. Identifying the symptom narrows your troubleshooting steps.
Step-by-step Hunter PGV valve troubleshooting checklist
Follow these steps in order. They are simple and safe.
- Turn off the controller and water to the zone.
- Manually open the valve bleed screw or solenoid to test flow.
- Check for obvious leaks or cracked piping at the valve.
- Inspect the solenoid for tightness and corrosion.
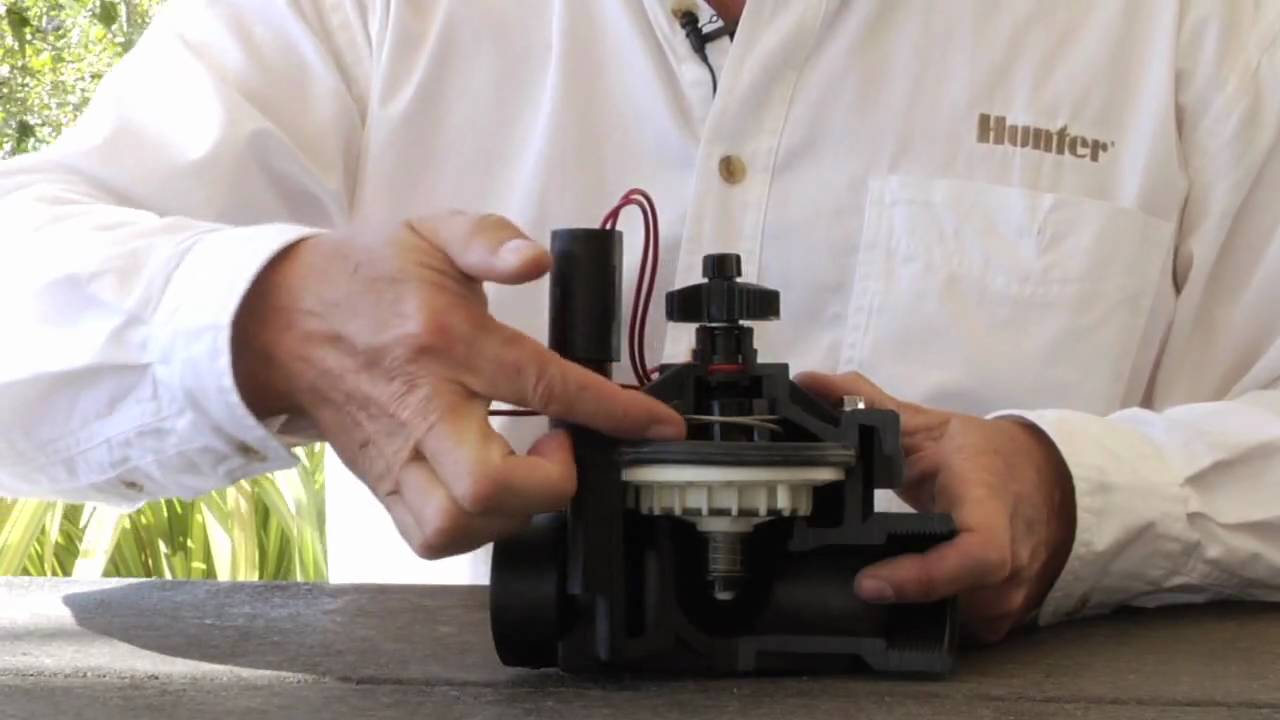
- Remove and clean the bonnet and diaphragm if dirt is visible.
- Test solenoid resistance with a multimeter; typical values are 20–60 ohms.
- Swap the solenoid with a working valve to confirm solenoid or wiring.
- Check the controller program and wiring for shorts or loose connections.
- Replace the diaphragm or solenoid if cleaning and tests fail.
- Restore water and test the zone under normal operating conditions.
These steps resolve most problems found in Hunter PGV valve troubleshooting. If the valve still fails, consider replacing the entire valve.
Testing and diagnosis tips
Use these tests to find the root cause quickly.
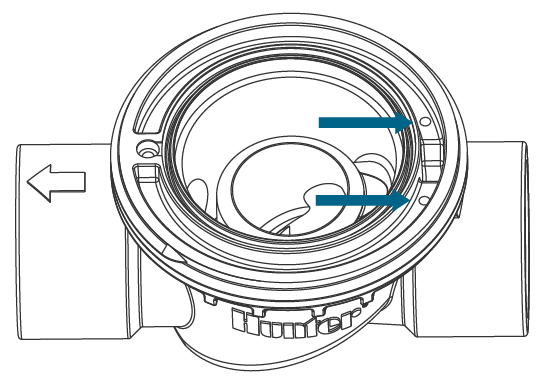
- Visual check: Look for cracks, grit, or mineral buildup.
- Manual open test: Press the bleed screw to see if flow starts. If it does, the solenoid or pilot passage may be blocked.
- Multimeter: Measure solenoid coil resistance. A very high or infinite reading shows a burned coil.
- Swap test: Move the solenoid to a known working valve. If the problem follows the solenoid, replace it.
- Pressure test: Low line pressure can mimic valve failure. Confirm system pressure first.
I once fixed a valve that cycled every minute. Cleaning a tiny grit particle from the pilot hole stopped the cycling. Small things matter in Hunter PGV valve troubleshooting.

Common repairs and replacement parts
Most repairs are inexpensive and quick.
- Diaphragm replacement: Usually the most common fix.
- Solenoid replacement: Replace if coil tests out or is corroded.
- Bonnet O-ring or screws: Replace if leaking or loose.
- Valve body replacement: Needed if cracked or severely worn.
- Washer and pilot parts: Replace when they are clogged or damaged.
Keep spare diaphragms and a spare solenoid on hand. That speeds up Hunter PGV valve troubleshooting in the field.
When to repair versus replace the Hunter PGV valve
Repair when the valve body is intact and parts are available. Repair is low cost and quick. Replace when the body is cracked, warped, or if you face repeated failures.
If you see rusted bolts, severe mineral buildup, or multiple failed parts, replacement may be more cost-effective. For high-use or older valves, replacement can prevent future downtime.

Preventive maintenance to avoid future issues
Simple care prevents most problems.
- Flush new installations before attaching valves.
- Install a filter or screen upstream to stop grit.
- Inspect valves annually for leaks and wear.
- Replace diaphragms every few years in hard water areas.
- Keep electrical connections dry and sealed.
I schedule valve checks in spring and fall. That reduced emergency calls by half in my experience. Preventive steps make Hunter PGV valve troubleshooting rare.

Tools and parts you should carry
Having the right tools speeds repairs.
- Multimeter for coil testing.
- Screwdrivers and pliers for bonnet and solenoid removal.
- Replacement diaphragms and solenoids.
- Teflon tape and pipe thread sealant.
- Small brush and clean water for flushing.
- Replacement valve body or full valve for quick swap.
A small kit in your truck or garage shortens downtime during Hunter PGV valve troubleshooting.
Safety and best practices
Follow these safety tips.
- Turn off water and power before opening a valve.
- Relieve pressure by opening a downstream fixture.
- Wear safety glasses and gloves to avoid injury.
- Use correct replacement parts to avoid leaks or failure.
- Test the zone at low pressure after repairs.
Safe work protects you and prevents new problems when doing Hunter PGV valve troubleshooting.
Frequently Asked Questions of Hunter Pgv Valve Troubleshooting
Why won’t my Hunter PGV valve open?
A blocked pilot passage, bad solenoid, or electrical issue often prevents opening. Clean the valve, test the solenoid with a multimeter, and check wiring to find the cause.
Why does my Hunter PGV valve stay open?
A torn diaphragm or debris in the pilot seat commonly causes a valve to stick open. Inspect and replace the diaphragm or clean the pilot parts to restore proper function.
How do I test a Hunter PGV solenoid?
Use a multimeter to measure coil resistance; typical readings are 20–60 ohms. Swap the solenoid with a working one to confirm electrical or solenoid failure.
Can I repair a Hunter PGV valve myself?
Yes. Many repairs are simple, like replacing diaphragms or solenoids. Follow safety steps and carry basic tools to do common Hunter PGV valve troubleshooting.
How often should I replace parts on a Hunter PGV valve?
Inspect annually and replace diaphragms every 2–4 years in hard water. Solenoids can last longer but replace if resistance is out of range or if corroded.
Conclusion
Hunter PGV valve troubleshooting is mostly about clear tests, cleaning, and swapping small parts. Follow the step-by-step checks, carry basic spares, and do routine maintenance to cut repair time. Try the simple fixes first, and replace the valve only if the body is damaged or tests fail.
Take action now: inspect your valves, assemble a small repair kit, and run the basic tests described here. Leave a comment with your issue or subscribe for more hands-on irrigation tips.

