
Most 3D printer issues come from bed, filament, or firmware, solvable with careful troubleshooting.

Today's Exclusive Deals
Limited-time Exclusive Deals. Check current discount on Amazon.
Check Price on Amazon As an Amazon Associate I earn from qualifying purchases.I’ve spent years fixing hobby and prosumer machines. This guide on 3d Printer Troubleshooting brings hands-on tips, clear checks, and step-by-step fixes. I’ll walk you through common causes, quick tests, and durable solutions so you can get back to printing reliably.
Common 3D Printer Problems and Quick Fixes
Beginners and pros see the same issues. Loose belts, bad bed adhesion, clogged nozzles, and wrong slicer settings top the list. For each issue I give a clear cause, a short test, and a practical fix. This section sets the foundation for deep troubleshooting later.
Today's Exclusive Deals
Limited-time Exclusive Deals. Check current discount on Amazon.
Check Price on Amazon As an Amazon Associate I earn from qualifying purchases.- Cause: Poor bed adhesion.
- Test: Try a skirt with first layer slow and watch the filament laydown.
- Fix: Clean bed, adjust Z-offset, use adhesive or heated bed.
- Cause: Under-extrusion.
- Test: Extrude 100 mm filament and measure actual feed.
- Fix: Clean nozzle, check PTFE tube, increase temp slightly, check extruder gear.
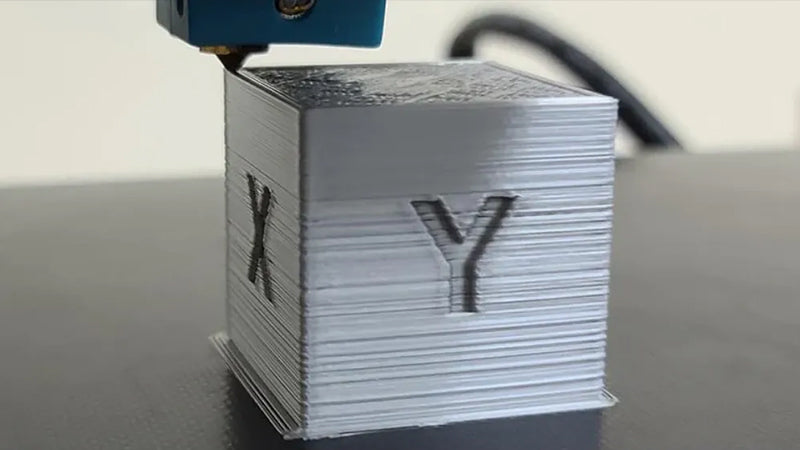
- Cause: Layer shifting.
- Test: Print a tall, narrow test and listen for skipped steps.
- Fix: Tighten belts, check stepper drivers, reduce print speed.
I use these checks on new printers and old machines. They catch most problems fast. Keep a small toolkit: hex keys, feeler gauge, small brush, spare nozzle, and a digital caliper. These tools speed up every fix.

Bed Leveling and Adhesion: The First Line of Defense
A bad first layer ruins prints fast. Proper bed leveling and adhesion is central to 3d Printer Troubleshooting. Most errors show here first.
Today's Exclusive Deals
Limited-time Exclusive Deals. Check current discount on Amazon.
Check Price on Amazon As an Amazon Associate I earn from qualifying purchases.- Why it matters:
- A correct gap lets filament squash just enough to stick.
- Too close blocks flow. Too far causes warping.
- Step-by-step leveling:
- Home all axes.
- Disable motors and move the head to each corner.
- Use a sheet of paper as a gap gauge between nozzle and bed.
- Adjust three or four leveling knobs until slight drag on the paper.
- Z-offset and first-layer settings:
- Set a Z-offset value to fine-tune without full re-level.
- Slow first layer speed to 20–30% and raise extrusion multiplier by 5–10% if needed.
- Bed surfaces and adhesives:
- Use glass, PEI, BuildTak, or painter’s tape depending on material.
- Apply glue stick or hairspray for tricky filaments like PETG.
From experience, many users overcomplicate leveling. Start simple. Level by feel, then tune slicer settings. If your printer has mesh bed compensation, use a probe but still validate manually.

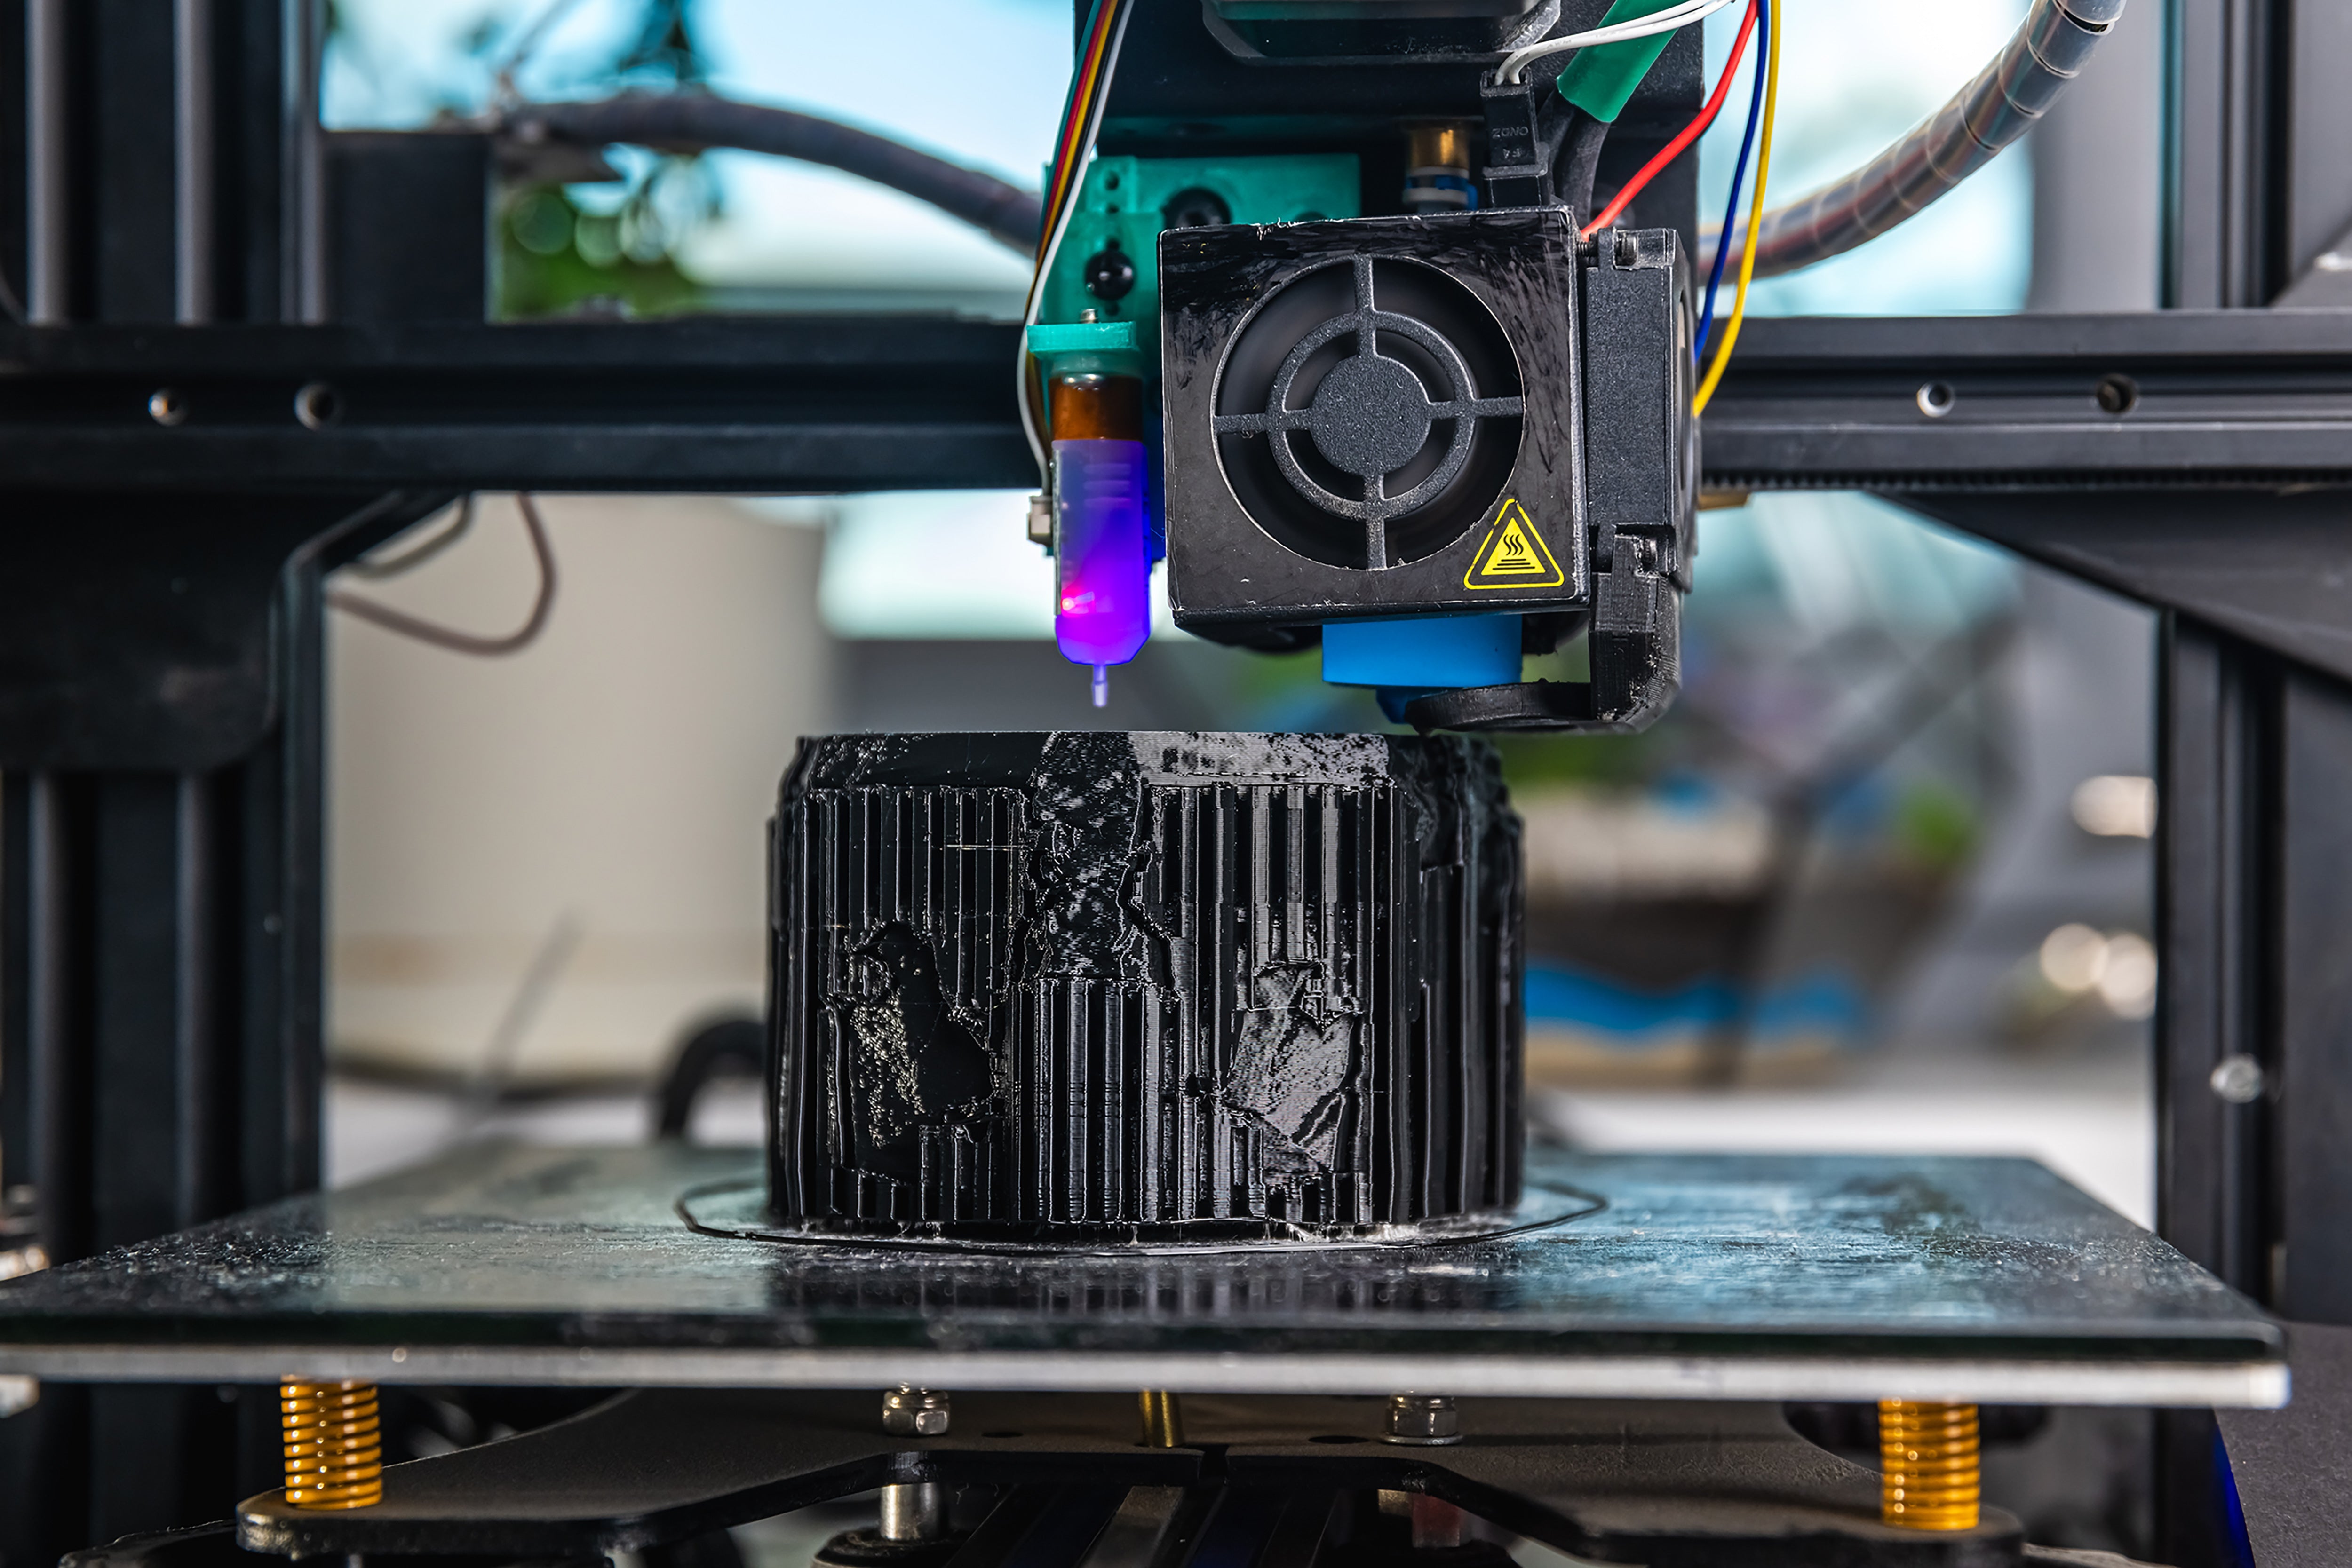
Extruder and Filament Issues: Feed, Grip, and Heat
Extruder problems cause under-extrusion, grinding, and clogs. Good 3d Printer Troubleshooting isolates the extruder, filament path, and temperature.
- Signs of extruder trouble:
- Clicking sounds, inconsistent flow, or thin strands.
- Quick checks:
- Pull filament out. Is the tip burned or soft?
- Run a cold-pull to clear debris from the nozzle.
- Inspect the drive gear for filament dust or a worn tooth.
- Filament quality and storage:
- Keep filament dry and away from sunlight.
- Use desiccant containers or airtight tubs for hygroscopic types.
- Temperature tuning:
- Print temperature towers to find the sweet spot.
- Some filaments need 5–15°C more or less than manufacturer suggestions.
- PTFE tube and hotend maintenance:
- Replace PTFE liners that are deformed.
- Swap nozzles every 100–300 hours depending on abrasive filaments.
A personal tip: mark a 100 mm distance on the filament and command a 100 mm extrusion. Measure and compare. That simple test saved me hours chasing slicer bugs.

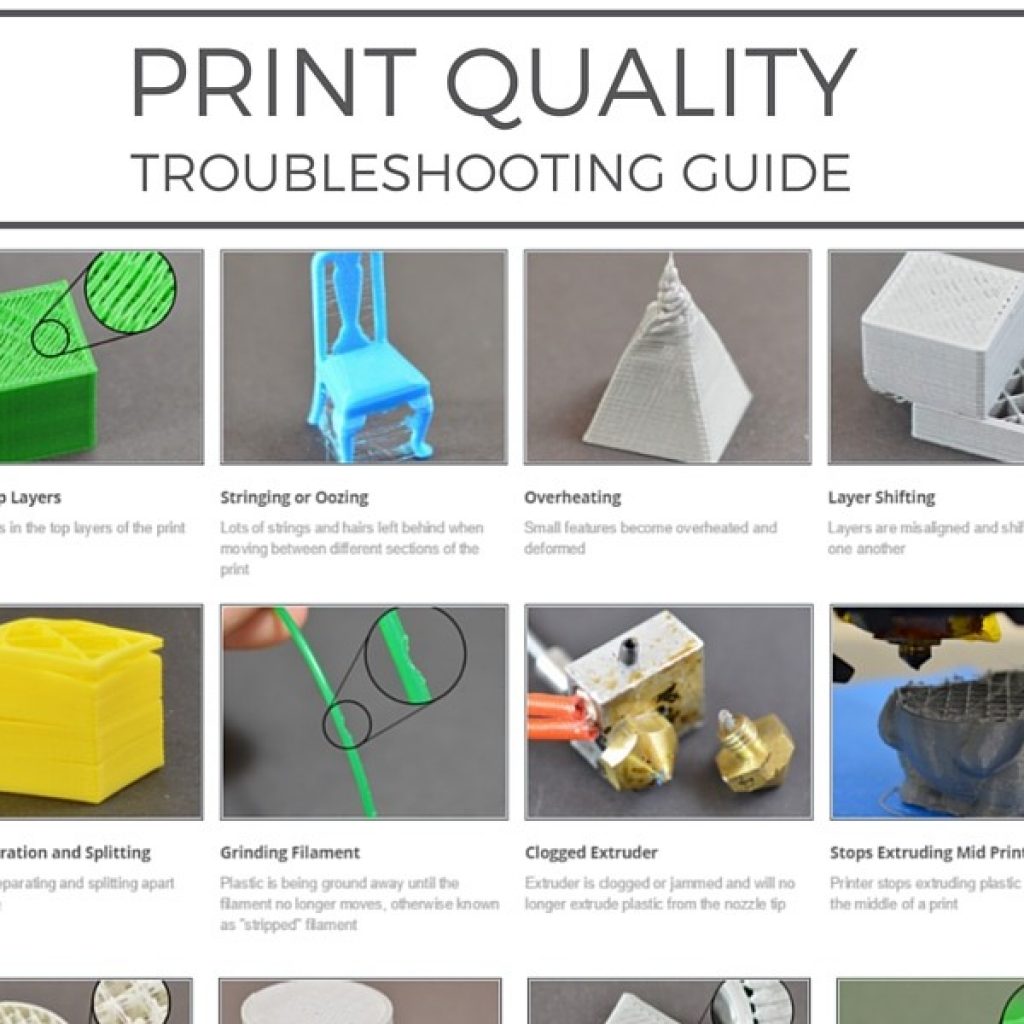
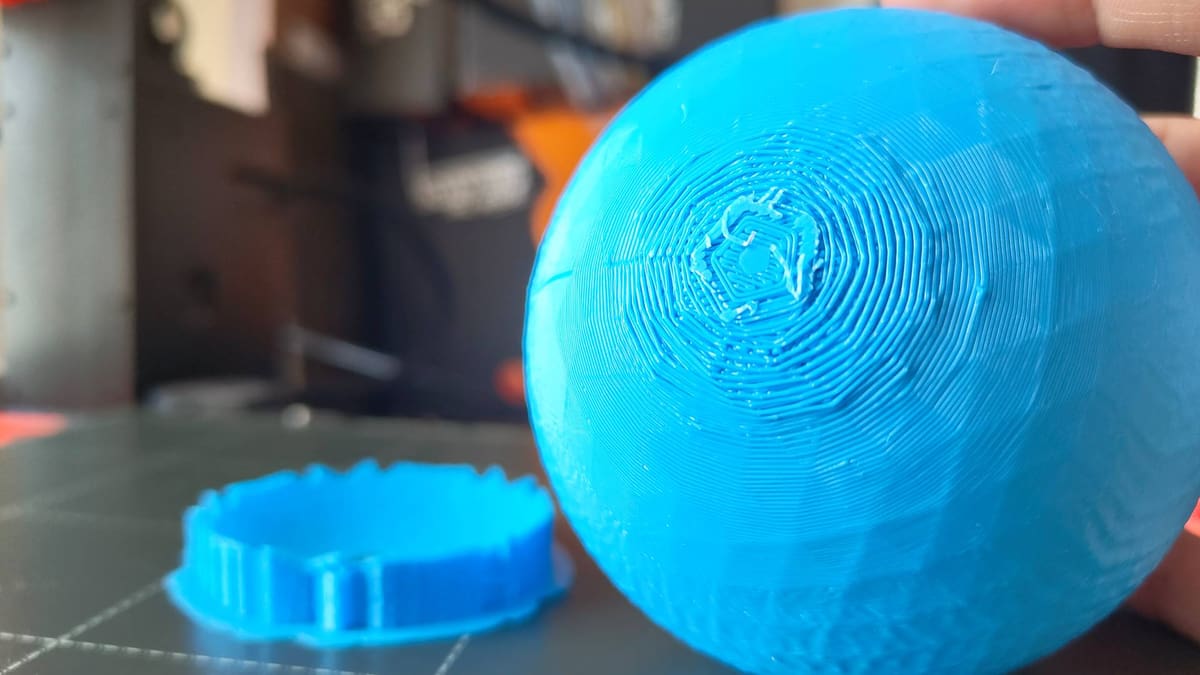
Print Quality Problems: Stringing, Blobs, and Layer Lines
Print flaws are often slicer or hardware-related. Focused 3d Printer Troubleshooting helps you find the root faster.
- Stringing and oozing:
- Cause: High print temp or low retraction.
- Fix: Lower temp 5–10°C, increase retraction distance or speed, enable combing.
- Blobs and zits:
- Cause: Poor retraction, retractions at layer change, or filament oozing.
- Fix: Tune coasting and wipe settings in slicer.
- Layer lines and banding:
- Cause: Inconsistent extrusion, mechanical wobble, or cooling issues.
- Fix: Check for loose bolts, tighten eccentric nuts, and improve part cooling.
- Surface roughness:
- Cause: Over-extrusion, incorrect flow rate, or wrong nozzle size.
- Fix: Calibrate extrusion multiplier, use proper nozzle for detail.
When I needed smooth parts, I printed calibration cubes and temperature towers back-to-back. Small changes in retraction and temp fixed 90% of finish issues.
Electronics, Firmware, and Calibration
Electrical and firmware problems are less visible but critical. Smart 3d Printer Troubleshooting includes firmware checks and calibration routines.
- Firmware and slicer mismatch:
- Ensure firmware steps-per-mm match slicer values.
- Update firmware carefully and back up settings.
- Motor and driver issues:
- Check stepper drivers for overheating.
- Reduce current or add cooling if drivers skip steps.
- Thermal safety:
- Verify thermistor and heater readings are stable.
- Replace sensors that show sudden jumps or zero reading.
- PID tuning and thermal stability:
- Run PID autotune for hotend and heated bed after hardware changes.
- Stable temps reduce stringing and extrusion variation.
- Electrical checks:
- Inspect wiring for chafing or loose connectors.
- Use strain relief to prevent intermittent faults.
I once had layer shifts caused by a loose wiring connector. Tightening a single plug fixed dozens of failed prints. Small checks often save big headaches.
Maintenance Checklist and Best Practices
Regular care reduces troubleshooting time. A set routine makes 3d Printer Troubleshooting easier and faster.
- Daily or before each print:
- Clean the bed surface.
- Check filament feed and spool path.
- Ensure the nozzle is clear of obvious debris.
- Weekly:
- Tighten belts and fasteners.
- Inspect bearings and rods for dust and wear.
- Lubricate linear rods lightly if required by your printer.
- Monthly:
- Calibrate steps/mm and re-run extrusion test.
- Check fan function and clean fan blades.
- Replace consumables like nozzles as required.
- Record keeping:
- Log filament lots, temps used, and successful settings.
- Note failures and fixes in a simple print journal.
Good maintenance saves time. I keep a logbook beside my printer. It helps me repeat successes and avoid past mistakes.
When to Seek Professional Help
Some issues need expert attention. Knowing when to ask for help is part of smart 3d Printer Troubleshooting.
- Consider professional service when:
- You see repeated electrical faults or smoke.
- Firmware updates fail and brick the printer.
- Mechanical damage or warped frames need repair.
- Cost vs. replacement:
- For older budget printers, repairs may cost more than upgrades.
- For high-end machines, a certified service can extend life and warranty.
If safety is a concern, stop and consult a pro. I’ve sent my own machines to service when I faced unusual electronics faults. It was faster and safer.
Frequently Asked Questions of 3d Printer Troubleshooting
Why does my print not stick to the bed?
Clean the bed with isopropyl alcohol, check Z-offset, and slow the first layer. Use adhesion aids like glue stick or tape for tough filaments.
How do I fix under-extrusion?
Check the nozzle for clogs, verify the extruder gear and filament path, and confirm correct temperature and extrusion multiplier. Run a 100 mm extrusion test to measure feed accuracy.
What causes layer shifts mid-print?
Layer shifts come from loose belts, skipped steps, or mechanical obstruction. Tighten belts, check motor drivers, and clear any touching wires or parts.
How often should I replace the nozzle?
Replace nozzles after 100–300 hours, or sooner with abrasive filaments. A worn nozzle causes poor surface finish and inconsistent extrusion.
Is filament moisture a big deal?
Yes. Moist filament bubbles and weakens prints. Store filament sealed with desiccant and dry hygroscopic types before printing.
Can firmware changes fix print quality?
Yes. Proper firmware settings for steps/mm, acceleration, and jerk affect print accuracy and smoothness. Always back up settings before updating.
What are the safest troubleshooting steps to try first?
Start with visual inspections, manual leveling checks, and extrusion tests. These low-risk tests catch most issues and prevent damage.
Conclusion
3d Printer Troubleshooting is a mix of careful checks, simple tools, and steady practice. Start with bed leveling, confirm filament and extruder health, tune slicer and temperatures, and maintain electronics and mechanics. Use a logbook and small routine checks to avoid repeat problems.
Try one fix at a time, track changes, and print test pieces often. If a problem persists, ask a community or a professional. Share your results, subscribe for updates, or leave a comment about your toughest printer problem to get help and tips.


