
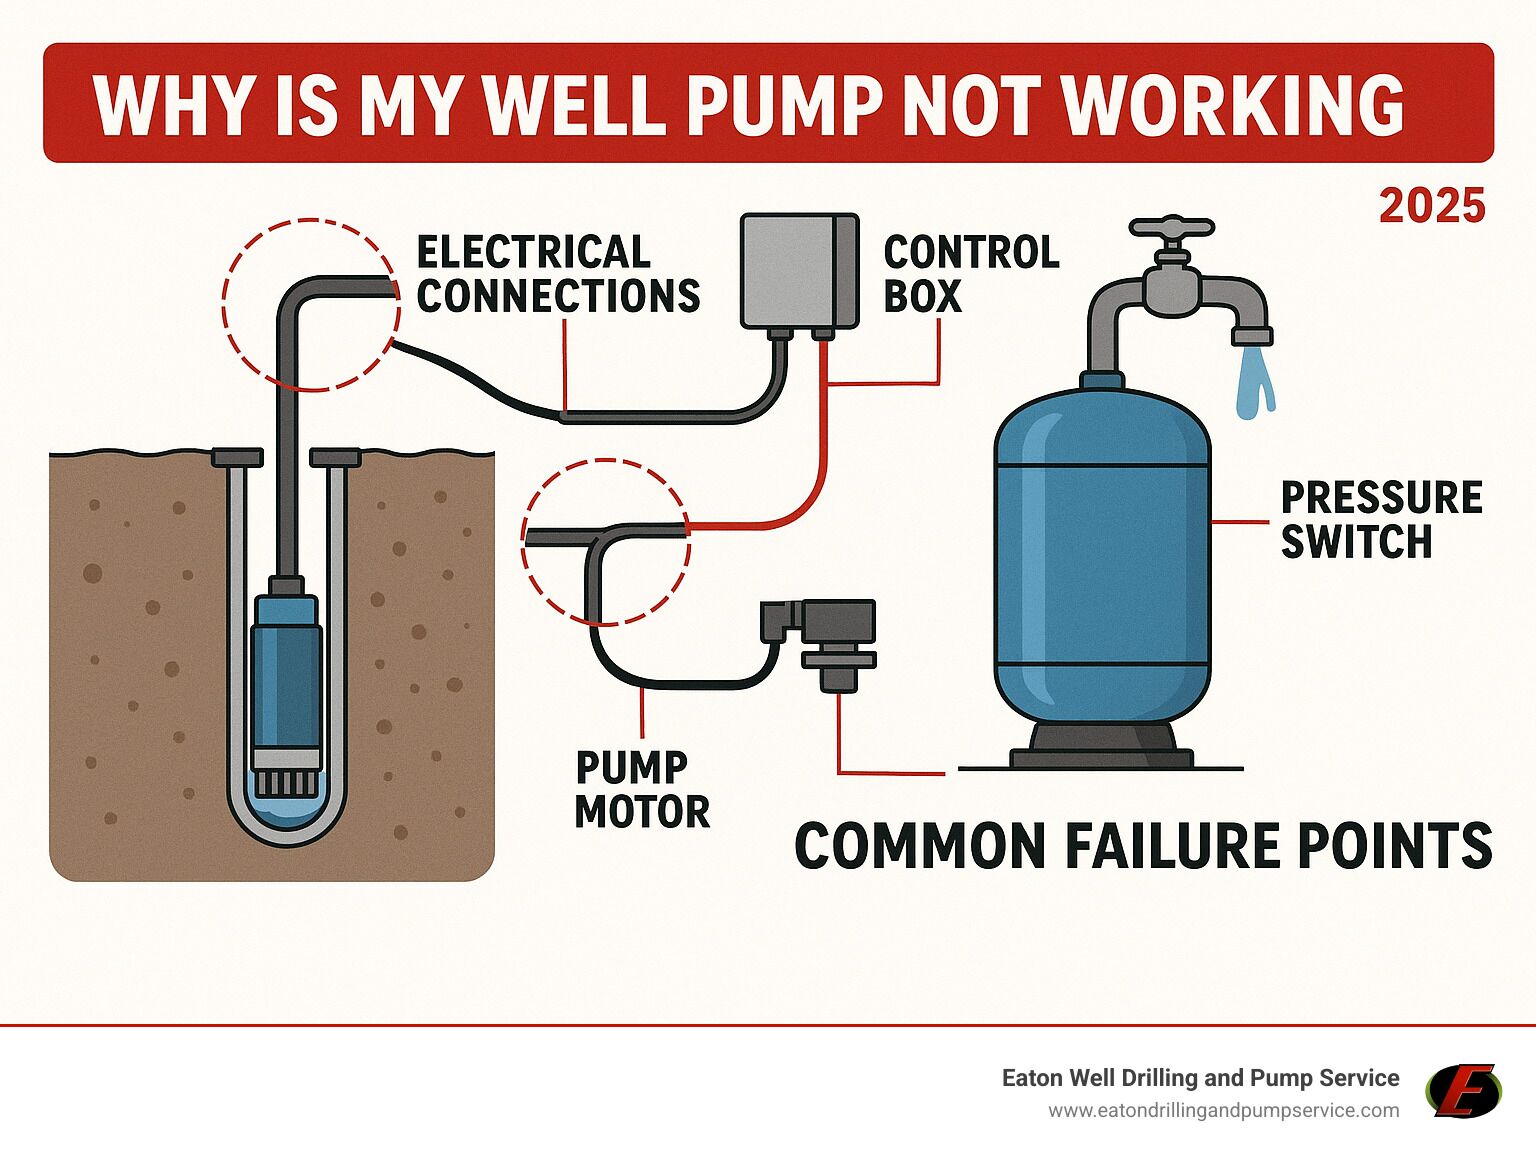
Most well pump pressure switch issues come from wiring faults, debris buildup, or misadjusted settings.
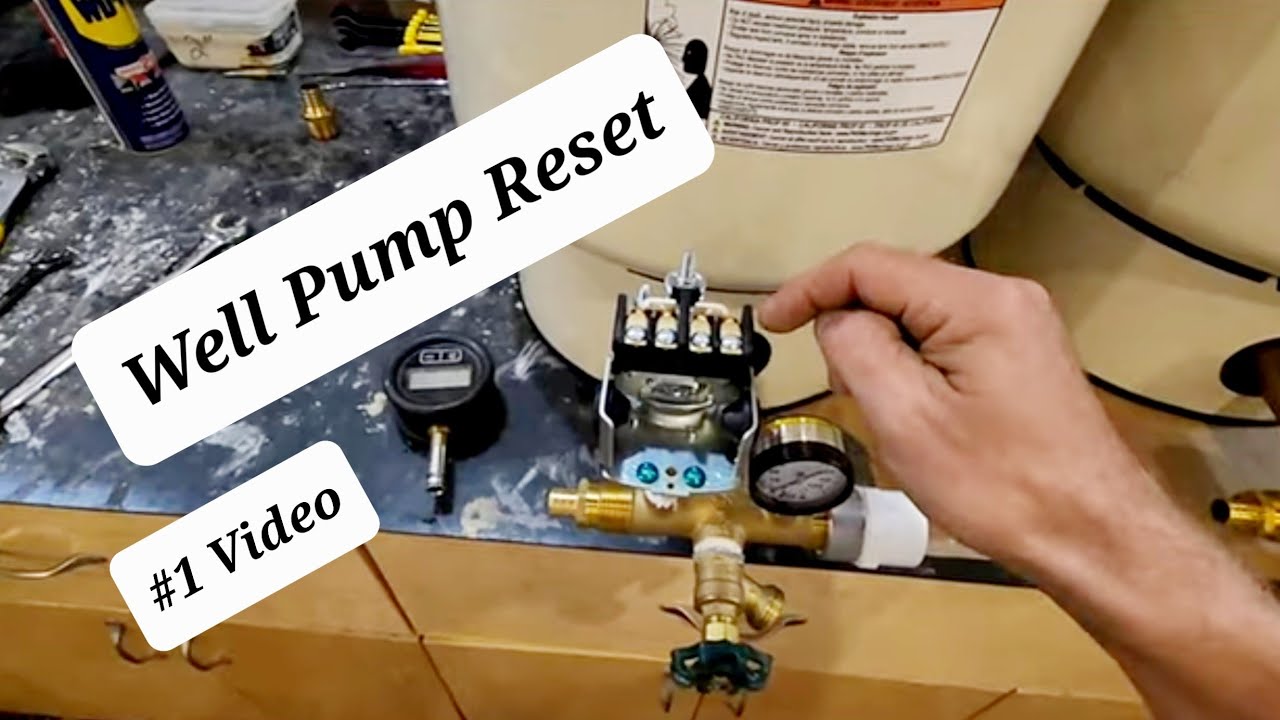
I have spent years diagnosing and fixing well systems, and this guide covers Well Pump Pressure Switch Troubleshooting from basics to advanced fixes. Read on for clear steps, safety tips, real examples, and practical advice to get your pump working reliably again.
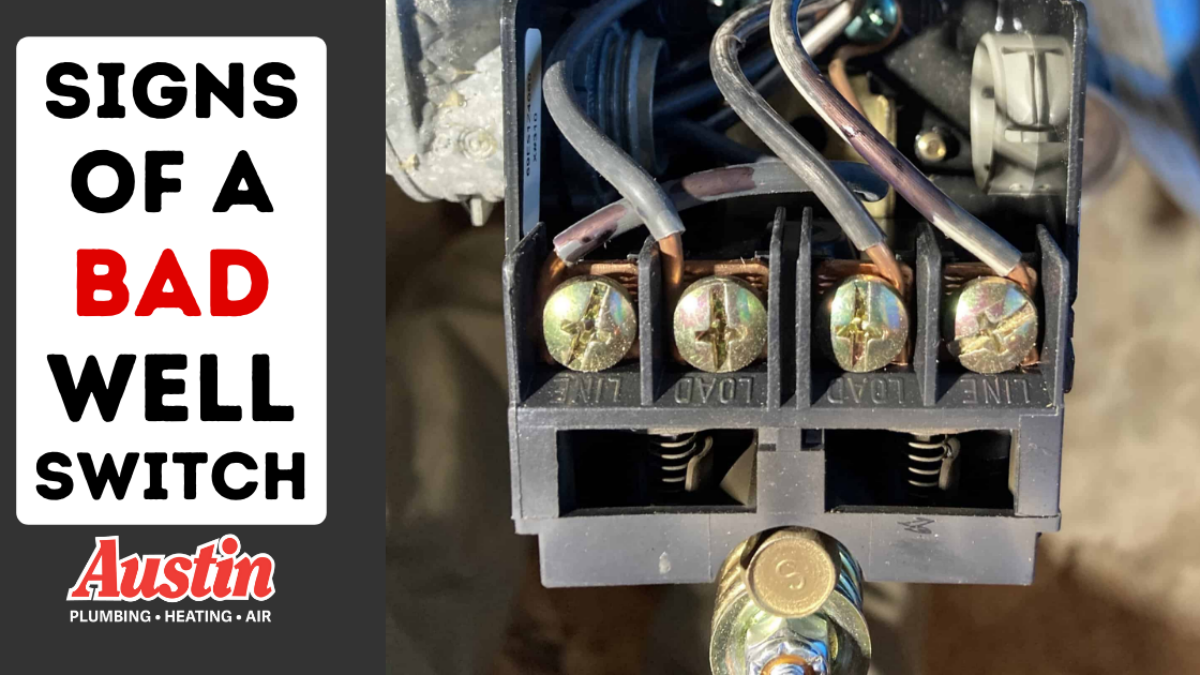
How a pressure switch works and why it matters for your well system
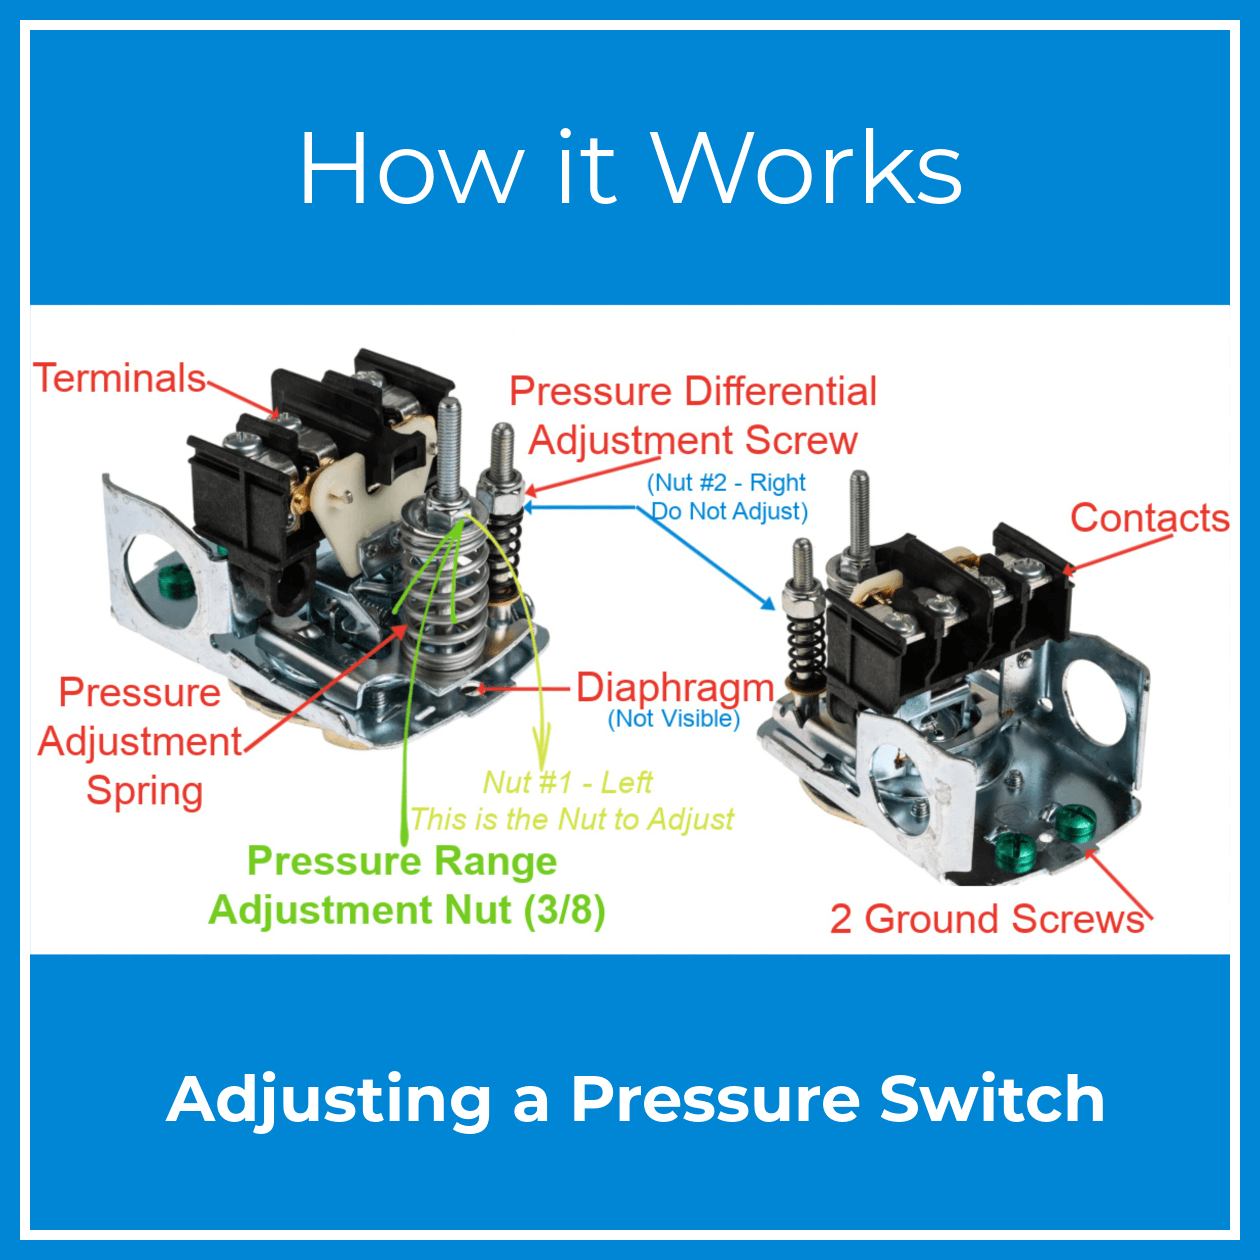
A pressure switch senses tank pressure. It tells the pump when to start and stop. The switch closes at the cut-in pressure and opens at the cut-out pressure. That on/off cycle protects your pump and keeps steady water pressure.
Understanding Well Pump Pressure Switch Troubleshooting means knowing how the switch, pressure tank, and pump interact. Small faults in the switch can cause pump short-cycling, no water, or damaged equipment. I explain each part so you can spot what is wrong quickly.
Common signs and causes of pressure switch problems
Watch for these common symptoms that point to switch issues:
- Rapid cycling of the pump with only short runs.
- Pump runs but no water pressure builds.
- Pump fails to start or trips the breaker.
- Water pressure is too high or too low consistently.
Common root causes include:
- Debris or mineral deposits inside the switch.
- Faulty or loose wiring and corroded terminals.
- Worn contacts or broken springs in the switch.
- Incorrect pressure settings or a failing pressure tank.
- Mechanical failure inside the pump or motor that mimics switch issues.
I’ve seen mineral buildup jam switches after long hard-water seasons. Simple cleaning often solves the problem, but electrical faults require care.

Step-by-step Well Pump Pressure Switch Troubleshooting guide
Follow this clear checklist. Work safely and use insulated tools.
- Confirm the symptom
- Note whether the pump is not starting, starting then stopping quickly, or running but not building pressure.
- Check power and breakers
- Ensure the pump breaker is on.
- Look for tripped GFCIs or blown fuses.
- Inspect the switch visually
- Turn off power at the breaker. Remove the cover.
- Look for burned contacts, loose wires, or debris.
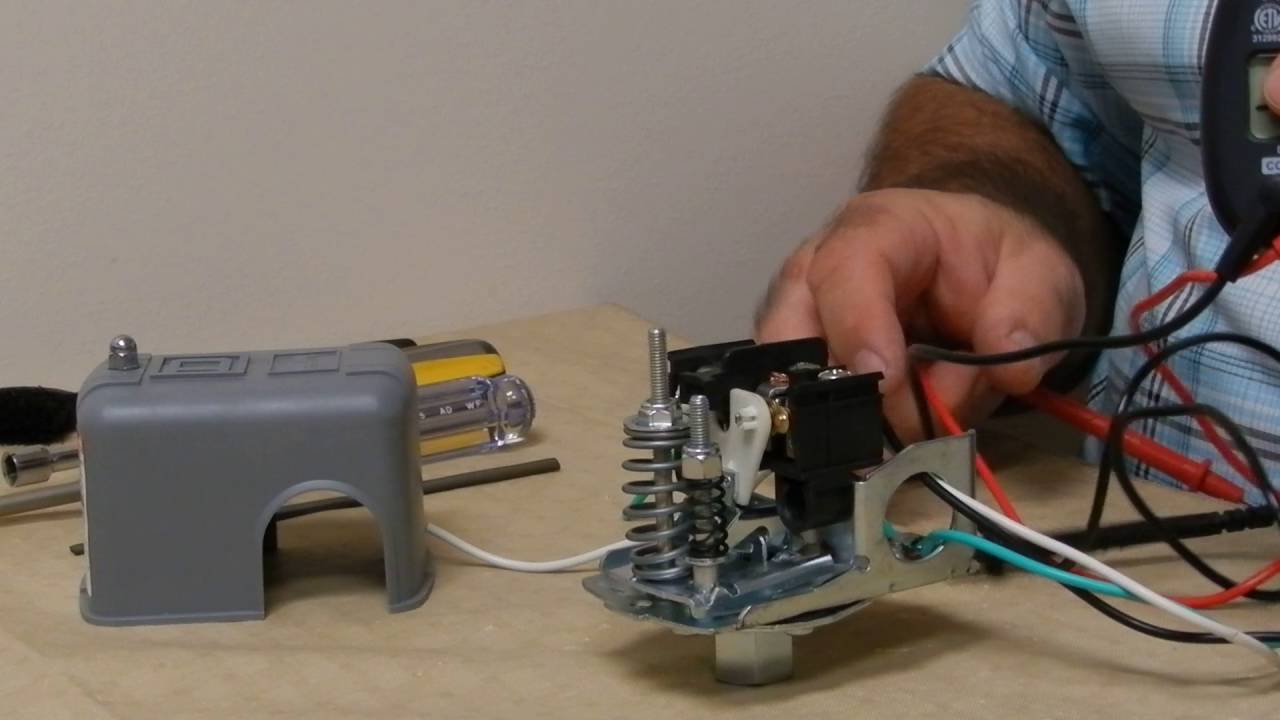
- Test for voltage
- With power on, test incoming and outgoing voltage at the switch using a multimeter.
- No incoming voltage points to a supply issue. Incoming but no outgoing voltage suggests a bad switch.
- Check the pressure tank
- Tap the tank. A full-sounding tank can mean a waterlogged tank.
- Check tank air pressure at the Schrader valve. It should be 2 psi less than cut-in pressure.
- Clean or replace parts
- Clean contacts if lightly corroded. Replace switch if contacts are pitted.
- Replace the internal rubber diaphragm or bell if present and damaged.
- Adjust settings if needed
- If pressure is wrong, adjust cut-in and cut-out per manufacturer steps. Small changes make a big difference.
- Test operation
- Restore power and cycle the system. Watch for proper cut-in/cut-out and no short cycling.
These steps cover most Well Pump Pressure Switch Troubleshooting scenarios. If voltage tests and wiring look fine but issues persist, the pump or pressure tank may be at fault.
Tools, parts, and safety tips
Essential tools and parts:
- Multimeter for voltage and continuity checks.
- Insulated screwdrivers and pliers.
- Replacement pressure switch (matched to system voltage and amps).
- Schrader valve tool and small pump or compressor for tank air pressure.
- Contact cleaner and small wire brush.
Safety tips:
- Always shut off power at the main breaker before opening the switch cover.
- Use a multimeter to verify power is off.
- Wear eye protection and insulated gloves when working on electrical parts.
- If you are not comfortable with live electrical testing, call a licensed electrician.
From experience, the right multimeter speeds up Troubleshooting. I once misdiagnosed a dead switch until I measured no incoming voltage—turns out the site breaker had a hidden trip.
Adjusting pressure switch settings and calibration
When to adjust:
- Low or high household pressure.
- Frequent cycling due to narrow cut range.
How to adjust safely:
- Turn off power to the pump.
- Remove the switch cover.
- Identify the two nuts: one for cut-in and one for the range.
- Turn small increments—clockwise raises pressure, counterclockwise lowers it.
- Tighten lock nuts and replace cover. Restore power and test.
Practical tips:
- Keep adjustments small. A 5-10 psi change can be noticeable.
- Match settings to tank specs and pump capacity.
- Document original settings before changing them.
Many homeowners over-adjust. I advise small steps and testing between changes to avoid creating new problems.

When to replace the pressure switch and how to choose one
Replace the switch if:
- Contacts are badly pitted or fused.
- The switch trips the breaker repeatedly.
- Internal parts are missing or the spring is broken.
- The switch fails voltage tests or continuity checks.
How to choose a replacement:
- Match voltage (120V or 240V) and maximum amp rating.
- Use the same cut-in and cut-out range or one that suits your system.
- Pick a reputable manufacturer and a switch rated for well service.
Installation tips:
- Turn off power and label wires before removal.
- Transfer wiring exactly as it was.
- Re-test system under load after replacement.
I once replaced a worn switch and regained five years of stable service. Replacing a small part saved the customer a pump motor rebuild.

Maintenance tips to prevent future problems
Simple maintenance extends life:
- Inspect the switch yearly for signs of wear or corrosion.
- Keep the well house clean and dry to reduce debris and corrosion.
- Check pressure tank air charge every year and top up as needed.
- Replace cheap switches proactively if you notice recurring problems.
Common mistakes to avoid:
- Adjusting settings too far from manufacturer specs.
- Working live on the switch without proper tools.
- Ignoring small signs like slow pressure loss—these often grow into bigger faults.
Routine care prevents many Well Pump Pressure Switch Troubleshooting calls. I recommend a quick annual check after winter or heavy use.
Frequently Asked Questions of Well Pump Pressure Switch Troubleshooting
What causes a pressure switch to short cycle?
Short cycling is usually caused by a waterlogged pressure tank, incorrect air charge, or faulty switch contacts. Fix the tank air pressure and inspect the switch for wear.
How do I test if the pressure switch is bad?
Use a multimeter to check for incoming and outgoing voltage at the switch while cycling the pump. No outgoing voltage with incoming present typically indicates a bad switch.
Can I clean a pressure switch instead of replacing it?
Light cleaning of contacts can restore function if corrosion is minor. Replace the switch if contacts are pitted or the mechanism feels loose.
What pressure settings should I use for my well pump?
Common settings are 30/50 psi, but match settings to your tank and pump specs. Do not exceed pump or tank manufacturer recommendations.
Is it safe to work on a pressure switch myself?
Basic visual inspections and air pressure checks are safe with power off and simple tools. For electrical testing or replacement, take proper safety precautions or hire a licensed electrician.
Conclusion
Well Pump Pressure Switch Troubleshooting is a mix of simple checks, safe electrical testing, and knowing when to replace parts. Follow the step-by-step guide, use the right tools, and perform yearly maintenance to avoid common failures. Take action today: check your tank air pressure, inspect the switch cover, and document any unusual behavior—or contact a pro if you are unsure. Share your experience below or subscribe for more how-to tips.

